Take on Your Own Do-It-Yourself Fence Project
Ready to take the reins of your fencing project and make it happen yourself? With our selection of quality materials, you can create the fence for your outdoor space, with a personal touch.

1. Buy the materials
Start your do-it-yourself project by selecting the materials you need from our wide range of products. Visit our online store now!
2. Pick-up material
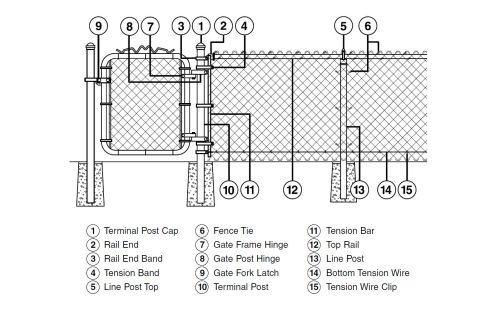
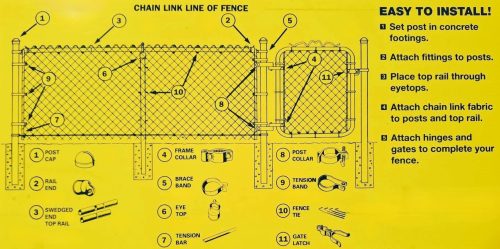
Once you have chosen your materials, paid for and picked up at Clôtures Eques, take a good look at the diagrams below on how to install your fence.
3. Enjoy your new fence!
Admire the result of your “do it yourself” project and enjoy the satisfaction of a job well done!
General Guide to Building Your Own Fence!
Completing a fence on your own can be a rewarding project that not only enhances the aesthetics of your property but also provides privacy and security. Here are some steps to help you plan your fence installation.
 Step 1: Planning and Design
 Step 1: Planning and Design
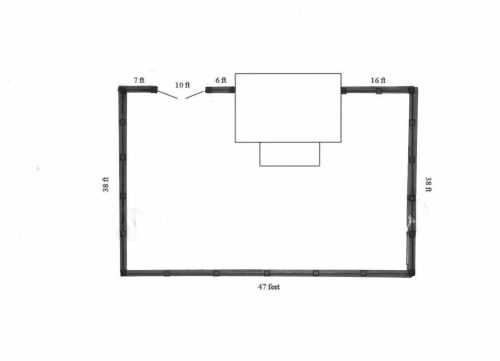
Before you start, it’s crucial to plan your project well. Determine the purpose of your fence: are you looking for more privacy, security, or is it purely aesthetic? The answer to this question will influence the type of fence you choose. Carefully measure the area to be fenced off and make a detailed plan including dimensions and layout. Don’t forget to check your municipality’s local regulations and permit requirements. Some fences may require prior approval, and it is important to respect property lines.
Step 2: Choosing Materials on our online boutique
Clôtures Eques offers you a selection of materials available on our online store (products). Check out what we have in stock for your fence installation. Popular options include wooden posts, for its traditional look; the Flex fence, known for its durability and minimal maintenance, the ornamental steel fence for a touch of elegance; and chain link mesh at a lower cost.
Choose a material that fits your needs, while taking into account your budget.
Step 3: Site Preparation
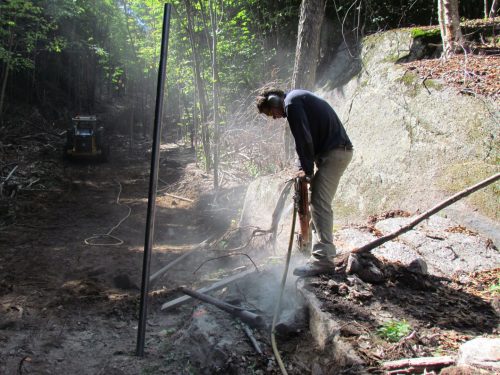
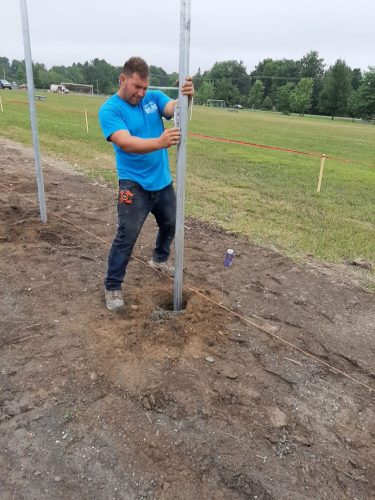
Site preparation is an often underestimated but essential step. Clean up the area where the fence will be installed, removing debris, stones, and weeds. Mark the location of the posts with paint or stakes and rope to ensure the fence will be straight. You need to make your calls and research for underground pipes and wires, e.g. info-excavation. Once your land is clear and safe, you are ready to fence.
Dig the holes for the posts to the recommended specifications, usually at least one-third of the length of the post should be buried to ensure stability.
 Step 4: Installation
 Step 4: Installation
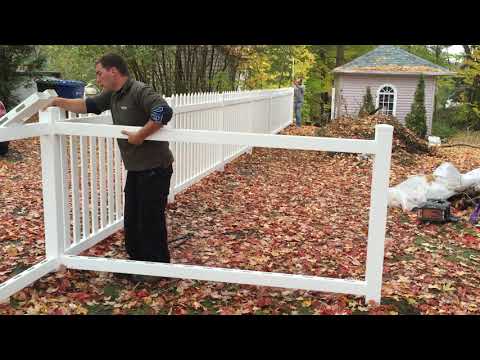
Installation varies depending on the type of fence chosen, but there are a few basic principles to follow. Start by installing the posts.
When installing the panels or mesh, make sure the fence is straight. If your land is sloping, you may need to adjust the panels to follow the profile of the ground, if necessary.
In conclusion, building your own fence is a very ambitious, but achievable project. By following these steps and taking the time to properly plan and execute your project, you can create a fence that meets your needs.
Remember, this is YOUR “do it yourself” project!
Clôtures Eques is always available to do your professional installation if you wish!
Fill out an online quote for materials and professional installation
Videos to Help You Out!

Video #1


Video #6

Video #5

Video #8